이진화
그레이스케일 이미지 → 흰색, 검정색으로 구성된 바이너리 이미지로 변경
영상처리알고리즘 사용 전, 전처리단계에서 사용됨
배경과 오브젝트를 분리하는데 사용할 수 있음
사용하는 함수는 다음과 같다.
retval, dst = cv2.threshold(src, thresh, maxval, type[, dst]) //이진화 하는 함수
dst=cv2.adaptiveThreshold(src, maxValue, adaptiveMethod, thresholdType, blockSize, C[, dst])
다음과 같이 코드를 작성한다.
import cv2

img_color = cv2.imread('bowling.jpg', cv2.IMREAD_COLOR)
img_gray = cv2.cvtColor(img_color, cv2.COLOR_BGR2GRAY)

#이진화 함수(이진화할 대상 이미지(그레이스케일), threshold(결과이미지가 0또는1), thresh_binary인 경우 threshold보다 이미지 픽셀이 클때 세번째 인자를 픽셀값으로 함,
#만약, 작다면 0을 픽셀값으로 함)
ret, img_binary = cv2.threshold(img_gray, 127, 255, cv2.THRESH_BINARY)

cv2.imshow("Binary", img_binary)
cv2.waitKey(0)

#윈도우 자원 해제
cv2.destroyAllWindows()
실행 결과

트랙바 생성
다음과 같이 트랙바를 생성하여 임계값을 조절하여 검출되는 영역을 조절한다.
소스코드
import cv2

#트랙바생성
def nothing(x):
    pass

cv2.namedWindow('Binary')
cv2.createTrackbar('threshold', 'Binary', 0, 255, nothing)
#127: 트랙바의 초기값
cv2.setTrackbarPos('threshold', 'Binary', 127)

img_color = cv2.imread('red_ball.PNG', cv2.IMREAD_COLOR)

img_gray = cv2.cvtColor(img_color, cv2.COLOR_BGR2GRAY)

#트랙바 이동시 결과를 확인할 수 있도록하는 루프 추가
while(True):
    #트랙바의 현재값을 가져와 threshold값의 임계값으로 사용
    low = cv2.getTrackbarPos('threshold', 'Binary')
    ret, img_binary = cv2.threshold(img_gray, low, 255, cv2.THRESH_BINARY)
    cv2.imshow('Binary', img_binary)

    #Esc를 누르면 루프에서 빠져나옴
    if cv2.waitKey(1)&0xFF == 27:
        break

cv2.destroyAllWindows()
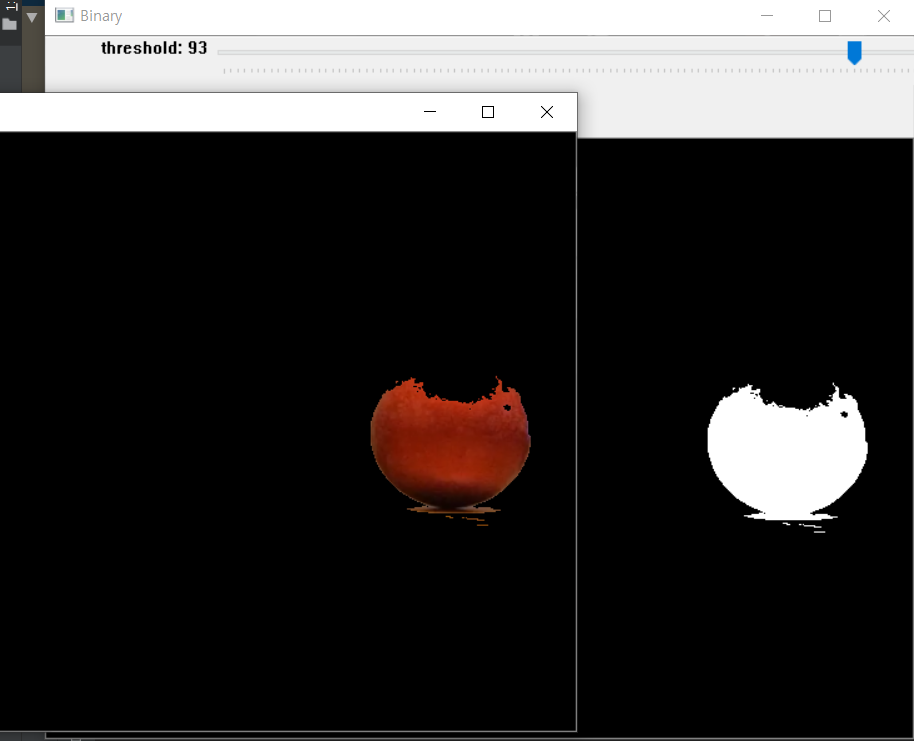
실행결과
임계값이 0이면 모든 픽셀이 흰색, 임계값이 높을수록 흰색의 영역이 줄어든다.

임계값이 85일때 공이 완전히 보이므로 초기값으로 설정해준다.
import cv2

#트랙바생성
def nothing(x):
    pass

cv2.namedWindow('Binary')
cv2.createTrackbar('threshold', 'Binary', 0, 255, nothing)
#127: 트랙바의 초기값
cv2.setTrackbarPos('threshold', 'Binary', 85)

img_color = cv2.imread('red_ball.PNG', cv2.IMREAD_COLOR)

img_gray = cv2.cvtColor(img_color, cv2.COLOR_BGR2GRAY)

#트랙바 이동시 결과를 확인할 수 있도록하는 루프 추가
while(True):
    #트랙바의 현재값을 가져와 threshold값의 임계값으로 사용
    low = cv2.getTrackbarPos('threshold', 'Binary')
    ret, img_binary = cv2.threshold(img_gray, low, 255, cv2.THRESH_BINARY_INV)
    cv2.imshow('Binary', img_binary)

    #원본 이미지와 바이너리 이미지 AND연산
    img_result = cv2.bitwise_and(img_color, img_color, mask=img_binary)
    cv2.imshow('Result', img_result)
    if cv2.waitKey(1)&0xFF == 27:
        break

    #Esc를 누르면 루프에서 빠져나옴
    if cv2.waitKey(1)&0xFF == 27:
        break

cv2.destroyAllWindows()
실행결과
공부분은 흰색이 되어야 추출할수있으므로 cv2.THRESH_BINARY_INV로 이미지를 반전시킨다
Reference
위 글은 아래 영상을 보고 공부하여 필기된 내용입니다.
https://www.youtube.com/watch?v=VtVPLJODqKw&list=PLwfJJiO20qkDue05S5MNhgYNnClMVlagN&index=4
'언어 > Python' 카테고리의 다른 글
| 파이참에서 패키지 설치하기 (0) | 2019.09.02 |
|---|---|
| 파이썬 pip란? (0) | 2019.09.01 |